
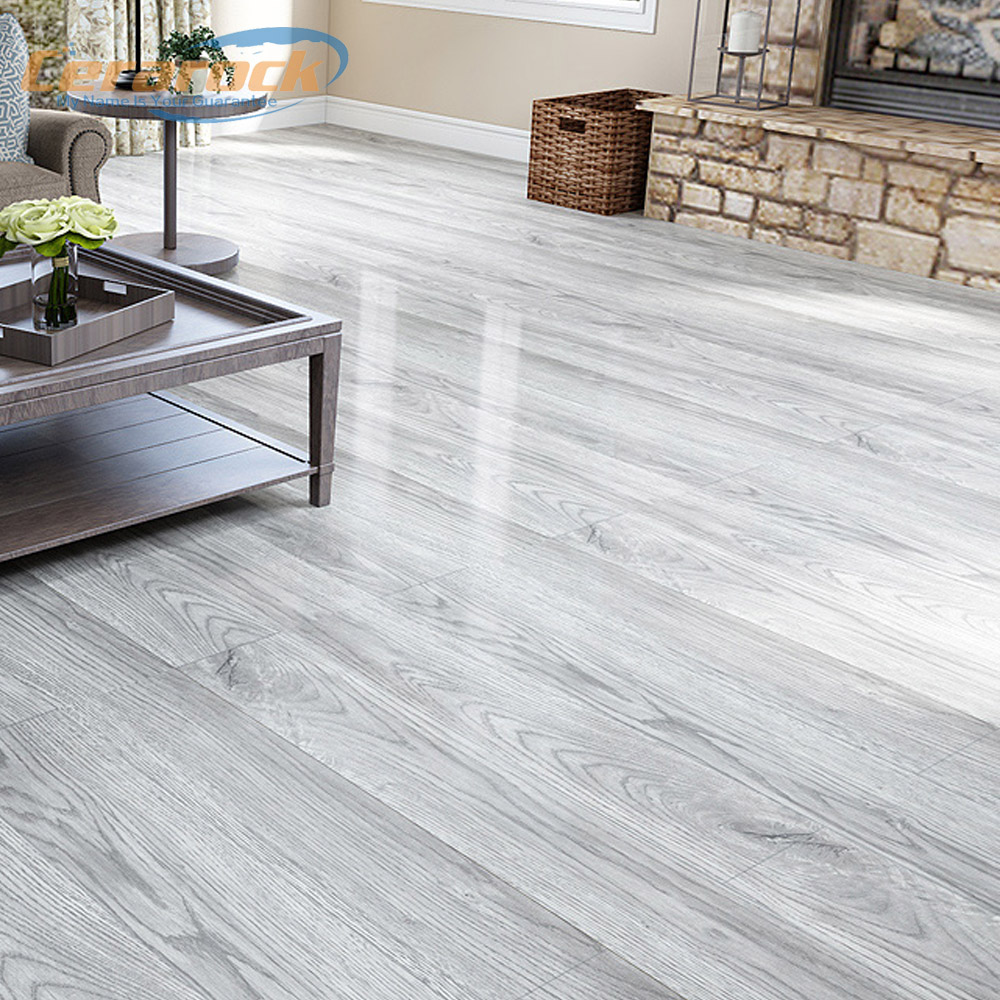
Are you struggling with outdated or damaged flooring that’s ruining the look of your home? You’re not alone. Many homeowners face this issue but are hesitant to take on a renovation project due to the perceived complexity and cost. The good news is that PVC flooring offers a simple, affordable, and stylish solution.
Laying PVC flooring is easier than you might think. With the right tools and a step-by-step guide, you can transform your living space in just a weekend. This article will walk you through the entire process, from choosing the right PVC tiles to the final touches. So, why wait? Dive in to discover how you can revamp your home’s flooring without breaking the bank or your back.
What You Will Need
List of Necessary Tools and Materials
Before you start laying your PVC flooring, it’s crucial to gather all the necessary tools and materials. Here’s what you’ll need:
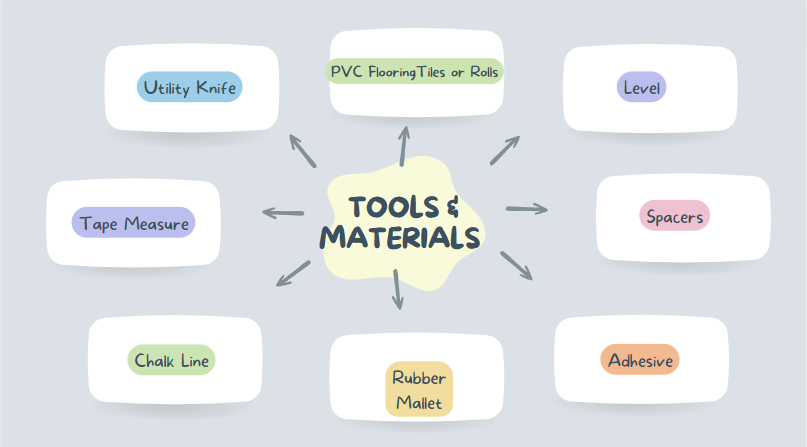
- PVC FlooringTiles or Rolls: Make sure to measure your room accurately to determine how much material you’ll need.
- Utility Knife: For cutting the PVC tiles to fit corners and edges.
- Tape Measure: Precision is key; a tape measure will help you make accurate cuts.
- Chalk Line: To mark guidelines on the subfloor.
- Rubber Mallet: For securing the tiles into place.
- Adhesive: Some PVC flooring options require a special adhesive.
- Spacers: To maintain uniform gaps between the tiles.
- Level: To ensure the floor is even.
Having laid PVC flooring in various settings, from residential homes to commercial spaces, I can’t stress enough the importance of having the right tools. They not only make the job easier but also ensure a professional finish.
Importance of Safety Equipment
Safety should never be compromised. Always wear safety goggles to protect your eyes from dust and debris, and gloves to protect your hands. A knee pad can also be beneficial for those extended periods of kneeling. I’ve seen too many DIYers skip safety gear, only to regret it later. Don’t make that mistake.
Where to Buy These Items?
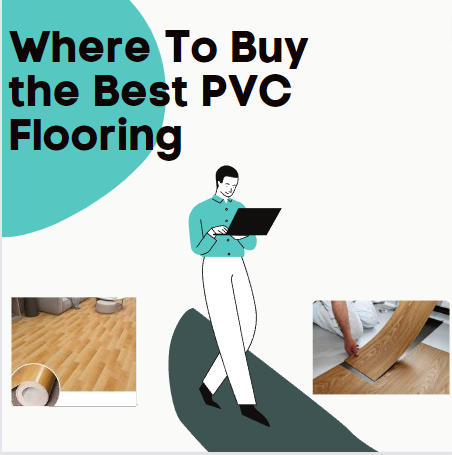
You can find all these tools and materials at your local hardware store. For a wider selection and potentially better prices, consider shopping online. Websites like Home Depot, Lowe’s, and even Amazon offer a variety of quality options. Having sourced materials for numerous projects, I can vouch for the reliability and quality of these platforms.
Preparing Your Floor
Before you even think about laying down your new PVC flooring, it’s essential to prepare the surface it will adhere to. A clean, smooth surface ensures that the tiles stick properly and last for years. In my years of laying flooring, I’ve found that a well-prepared surface can make or break the longevity and appearance of your new floor.
Clean the Floor
Start by sweeping the floor to remove any loose dirt and debris. Follow this up with a thorough mopping using a pH-neutral cleaner. Make sure the floor is completely dry before moving on to the next step. I’ve often seen people rush through this part, only to face issues like peeling and bubbling later on. Take your time; it’s worth it.
Repair Any Imperfections
If your subfloor has cracks, holes, or uneven spots, now is the time to address them. Use a patching compound to fill in any imperfections and sand it down once it’s dry. This ensures a level surface that will allow your PVC flooring to lay flat and stay put. Trust me, taking the extra time to do this will save you from headaches down the line.
Considerations for Different Types of Sub-Floors
Different sub-floors require different preparations:
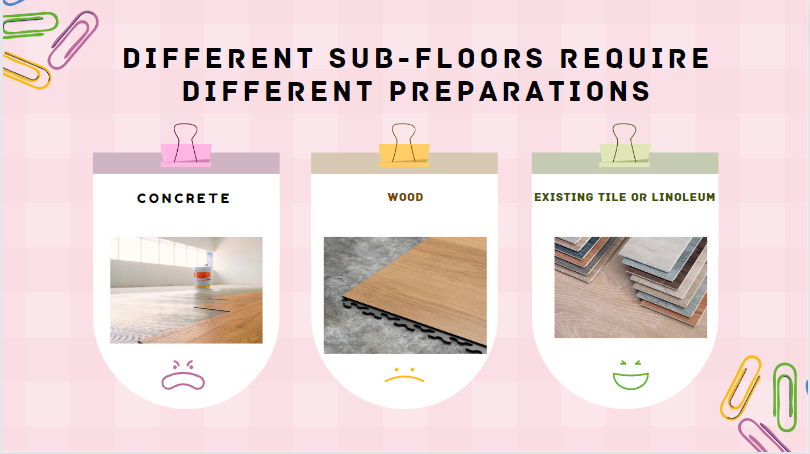
- Concrete: Make sure it’s dry and free of any paint or adhesive residue. A moisture barrier might be necessary in damp environments.
- Wood: Check for loose boards and secure them. Sand down any high spots.
- Existing Tile or Linoleum: Clean thoroughly and check for loose or damaged tiles that need to be repaired or replaced.
Having worked on various types of sub-floors, I can attest that each comes with its own set of challenges. But with the right preparation, laying PVC flooring can be a smooth process, regardless of the surface you’re working with.
Layout Planning
Before you start laying down any tiles, it’s crucial to have a well-thought-out plan for your layout. This step is often overlooked, but it’s one of the most important parts of the process. A well-planned layout ensures that your floor will not only look aesthetically pleasing but also be structurally sound. In my years of experience, I’ve found that little planning goes a long way in avoiding costly mistakes and rework.
Measure Your Room
Accurate measurements are the foundation of a successful flooring project. Use a tape measure to get the length and width of your room. Multiply these numbers to get the total square footage. Always add 10% extra for cutting waste. I’ve seen projects exceed budget and time because of inaccurate measurements, so double-check your numbers.
Determining the Layout and Direction of the Floor
The direction in which you lay your PVC tiles can dramatically affect the room’s appearance. For a longer, narrower room, consider laying the tiles lengthwise to give the room a more expansive feel. For square rooms, you have more flexibility. Use chalk lines to mark your layout before you start installing the tiles. This ensures that you start straight and stay that way, a lesson I’ve learned from countless projects.
Tips for Minimizing Waste
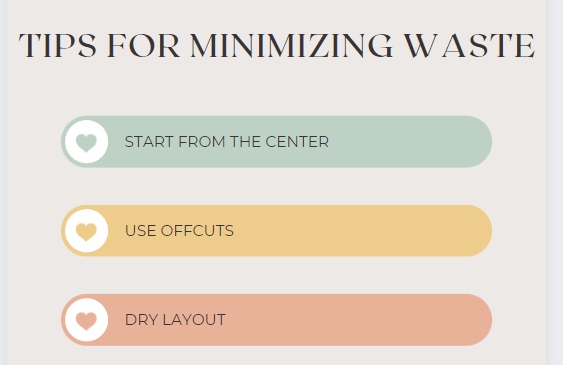
- Start from the Center: This allows for even cuts on both sides of the room, reducing waste.
- Use Offcuts: Save the pieces you cut off and see if they can be used elsewhere.
- Dry Layout: Before adhering to anything, lay out a dry section to make sure everything fits.
Minimizing waste is not just good for your pocket but also for the environment. These tips are based on years of fine-tuning my approach to various projects, ensuring efficiency and sustainability.
Installation Process: Step-by-Step Guide
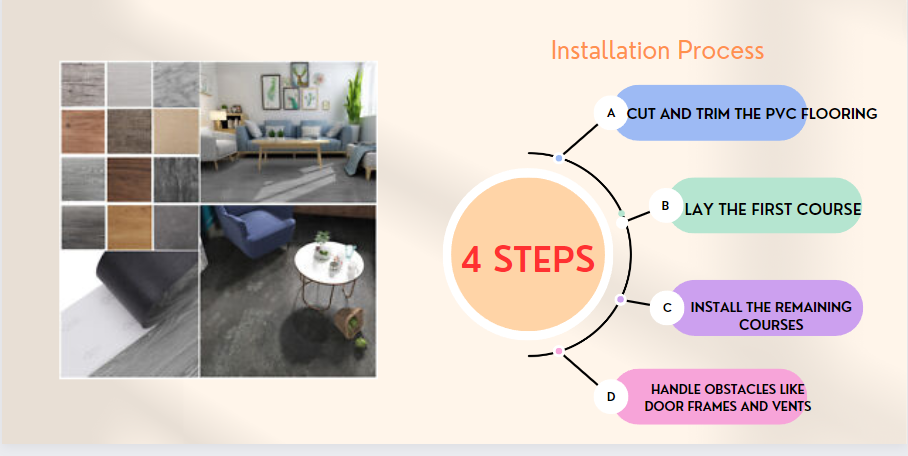
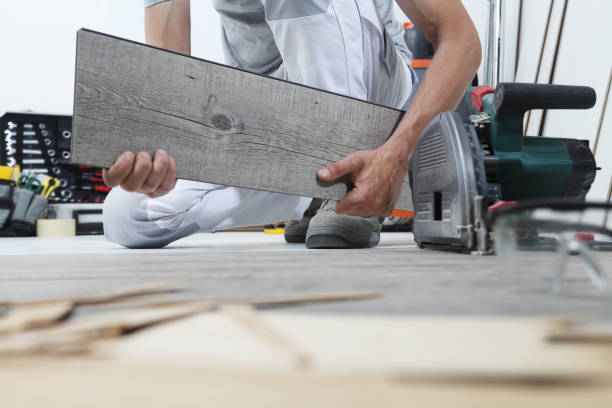
Step 1: Cut and Trim the PVC Flooring
- What You’ll Need: Utility knife, straight edge, measuring tape, and cardboard for templates.
- Process: Measure the area where the tile will go and mark the dimensions on the tile. Place a straight edge along the marks and use a utility knife to make a clean cut. For intricate cuts, like around corners or obstacles, create a cardboard template first. Always remember to measure twice and cut once to ensure accuracy.
Step 2: Lay the First Course
- What You’ll Need: PVC tiles, adhesive (if required), spacers, and a rubber mallet.
- Process: Start by laying out the first row of tiles without adhesive to ensure they fit well. Use spacers between the tiles to maintain uniform gaps. Once you’re satisfied with the layout, apply the adhesive as per the manufacturer’s instructions. Use a rubber mallet to gently tap each tile into its place, ensuring it’s secure.
Step 3: Install the Remaining Courses
- What You’ll Need: PVC tiles, rubber mallet, and spacers.
- Process: After the first course is laid and secure, continue laying tiles row by row. Make sure to stagger the joints between tiles for better structural integrity. This not only looks better but also provides a stronger floor. Use a rubber mallet to gently tap each tile into place, ensuring a snug fit.
Step 4: Handle Obstacles Like Door Frames and Vents
- What You’ll Need: Utility knife, measuring tape, and possibly a chisel for woodwork.
- Process: Obstacles like door frames and vents require special attention. For door frames, use a utility knife or chisel to cut the bottom of the frame so that the tile can slide underneath. For vents, measure the opening carefully and mark those dimensions on the tile. Cut the tile so it fits perfectly around the vent.
Finishing Touches
Applying Floor Adhesive
If your PVC flooring requires adhesive, this is the time to apply it. Use a notched trowel to spread the adhesive evenly over the surface, working in small sections to prevent it from drying out. Having worked with various types of adhesives, I can say that following the manufacturer’s instructions to the letter is crucial for optimal results.
Seal the Edges
Sealing the edges of your PVC flooring is essential for preventing water damage and ensuring longevity. Use a silicone caulk to seal the edges where the floor meets the wall. Apply the caulk smoothly and evenly, wiping away any excess with a damp cloth. This is a step I never skip, as it adds an extra layer of protection to your new floor.
Final Cleaning Tips
Once the adhesive and sealant have dried, it’s time for the final clean-up. Use a soft cloth or mop to remove any adhesive residue or fingerprints. A gentle, pH-neutral cleaner works best for this. Over the years, I’ve found that this final cleaning step adds a polished look to the project, making your new floor truly shine.
How Long to Wait Before Walking on the Floor
The waiting time before you can walk on your new floor varies depending on the type of adhesive used. Generally, it’s best to wait at least 24 hours to allow the adhesive to set fully. Trust me, the wait is worth it. Rushing this step can lead to tile shifting, compromising your entire floor’s integrity.
Maintenance Tips for PVC Flooring
Daily and Periodic Cleaning Tips
Maintaining your PVC flooring is relatively straightforward but crucial for its longevity. For daily cleaning, a simple sweep or vacuum will suffice. For a deeper clean, use a damp mop with a pH-neutral cleaner. Avoid using abrasive cleaners or pads, as they can damage the surface. From my experience, a consistent cleaning routine is the key to keeping your floor looking new for years.
Common Problems and How to Solve Them
| Staining | Use a soft cloth and a mild cleaner to remove stains. Avoid bleach or harsh chemicals. |
| Scratches | Minor scratches can often be buffed out with a soft cloth. |
| Peeling Corners | If a tile starts to peel up at the corners, a small amount of adhesive can re-secure |
Even the best-laid floors can encounter issues. Here are some common problems and their solutions:
- Staining: Use a soft cloth and a mild cleaner to remove stains. Avoid bleach or harsh chemicals.
- Scratches: Minor scratches can often be buffed out with a soft cloth.
- Peeling Corners: If a tile starts to peel up at the corners, a small amount of adhesive can re-secure it.
Having dealt with these issues in various settings, I assure you that most problems have simple solutions if addressed promptly.
How to Maintain Its Durability and Appearance
| Use Furniture Pads | Placing pads under furniture legs can prevent scratches. |
| Avoid Direct Sunlight | Excessive sunlight can fade the color, so use blinds or curtains to mitigate this. |
| Regular Inspection | Periodically inspect the floor for signs of wear or damage and address them promptly. |
To maintain the durability and appearance of your PVC flooring, consider the following:
- Use Furniture Pads: Placing pads under furniture legs can prevent scratches.
- Avoid Direct Sunlight: Excessive sunlight can fade the color, so use blinds or curtains to mitigate this.
- Regular Inspection: Periodically inspect the floor for signs of wear or damage and address them promptly.
These tips are based on years of maintaining various types of flooring. They will help ensure that your PVC floor remains as stunning as the day it was installed.
Conclusion
Laying PVC flooring is a rewarding project that can transform the look and feel of your home. From the initial planning and preparation to the installation and finishing touches, each step is crucial for achieving a durable and aesthetically pleasing result. Having guided you through this comprehensive guide, I’m confident you’re well-equipped to successfully tackle this project.
Don’t underestimate the value of a well-laid PVC floor. It’s not just about visual appeal; it’s also about long-term durability and ease of maintenance. So if you’re looking for a flooring solution that combines beauty, durability, and practicality, you’ve found the right guide to help you every step of the way.
