
Luxury vinyl tile (LVT) flooring has quickly become a popular choice for homeowners and commercial spaces alike due to its durability, versatility, and easy maintenance. However, when it comes to installation, there are two main methods to choose from: glue down and floating. Each method has its unique advantages and disadvantages and deciding which one to use depends on a variety of factors such as the subfloor, the room’s environment, and the budget. In this article, we’ll explore the differences between glue-down LVT flooring and floating LVT flooring, and help you determine which one is the best fit for your specific flooring needs.
When it comes to choosing between Glue Down LVT Flooring and Floating LVT Flooring, there is no one-size-fits-all answer. Each type of flooring has its advantages and disadvantages, and the best option for your project will depend on the specific needs of your space.
Glue Down LVT Flooring is more permanent than Floating LVT Flooring, which means that it can provide better protection from moisture and spills. Glue Down LVT Flooring also provides a more solid footing when compared to Floating LVT Flooring, making it an ideal choice in areas prone to heavy foot traffic such as kitchens or hallways. Additionally, Glue Down LVT Flooring is often less expensive upfront than Floating LVT Flooring.
On the other hand, Floating LVT Flooring offers greater ease of installation and can be removed without damaging the existing flooring. It also is slightly more soundproof than Glue Down LVT Flooring, making it a great choice for areas where noise can be an issue. Additionally, Floating LVT Flooring is more temperature-resistant than Glue Down LVT Flooring and may be a better choice for those in areas with extreme temperature fluctuations.
In the end, when choosing between Glue Down LVT Flooring and Floating LVT Flooring, the best option is to consider your individual needs and preferences. If you need a more permanent flooring solution that can withstand heavy foot traffic, Glue Down LVT Flooring may be the best choice.
In the following sections, we’ll dive deeper into each installation method, discussing everything from their cost to their durability and installation requirements. By the end of this article, you’ll have a better understanding of the pros and cons of glue-down LVT flooring versus floating LVT flooring and be better equipped to make the right choice for your flooring project.
Definition of LVT flooring
LVT stands for Luxury Vinyl Tile, which refers to a type of vinyl flooring that closely mimics the look and feel of natural materials such as wood, stone, and ceramic. LVT flooring is made of several layers of vinyl that are fused using heat and pressure to create a durable, resilient surface. The top layer is typically a high-quality print layer that replicates the texture and appearance of the desired material, while the middle layers provide structural stability and sound insulation. LVT flooring is often chosen for its ease of installation, low maintenance requirements, and cost-effective price point when compared to natural materials.
Glue-down LVT flooring

Glue-down LVT stands for “glue-down luxury vinyl tile,” which is a type of flooring that is made from vinyl material and is installed using adhesive or glue. Unlike other types of LVT, such as floating or click-lock, glue-down LVT is adhered directly to the subfloor using a specially formulated adhesive.
Glue-down LVT is a popular flooring option for commercial and residential spaces because of its durability, easy maintenance, and realistic look and feel of natural materials like wood or stone. Additionally, since the tiles are glued to the subfloor, they offer a stable and secure installation, which makes them ideal for high-traffic areas.
While glue-down LVT installation can be more time-consuming and labor-intensive compared to other types of LVT, it can provide a long-lasting and high-quality flooring solution for any space.
Installation process:
The installation process for glue-down LVT flooring typically involves the following steps:
- Subfloor preparation: The subfloor needs to be clean, level, and free from any debris or moisture. Any cracks or imperfections in the subfloor should be filled and leveled.
- Layout: Before installing the tiles, plan the layout by marking the center of the room and dry-fitting the tiles to determine the best starting point.
- Adhesive application: Apply adhesive to the subfloor in small sections, using a notched trowel to spread it evenly.
- Tile installation: Place the first tile at the center of the room and press firmly into the adhesive. Continue laying the tiles, making sure to leave a small gap between each tile to allow for expansion.
- Cutting tiles: Measure and cut tiles to fit around the edges of the room or obstacles using a utility knife or a tile cutter.
- Finishing touches: Once all the tiles have been installed, remove any excess adhesive, and allow the floor to dry for the recommended time before walking on it.
Overall, glue-down LVT installation can be more time-consuming and complex compared to other types of LVT, but it can provide a long-lasting and high-quality flooring solution for any space. It is important to follow the manufacturer’s instructions and consult with a professional installer if you are unsure about any steps in the process.
Floating LVT flooring
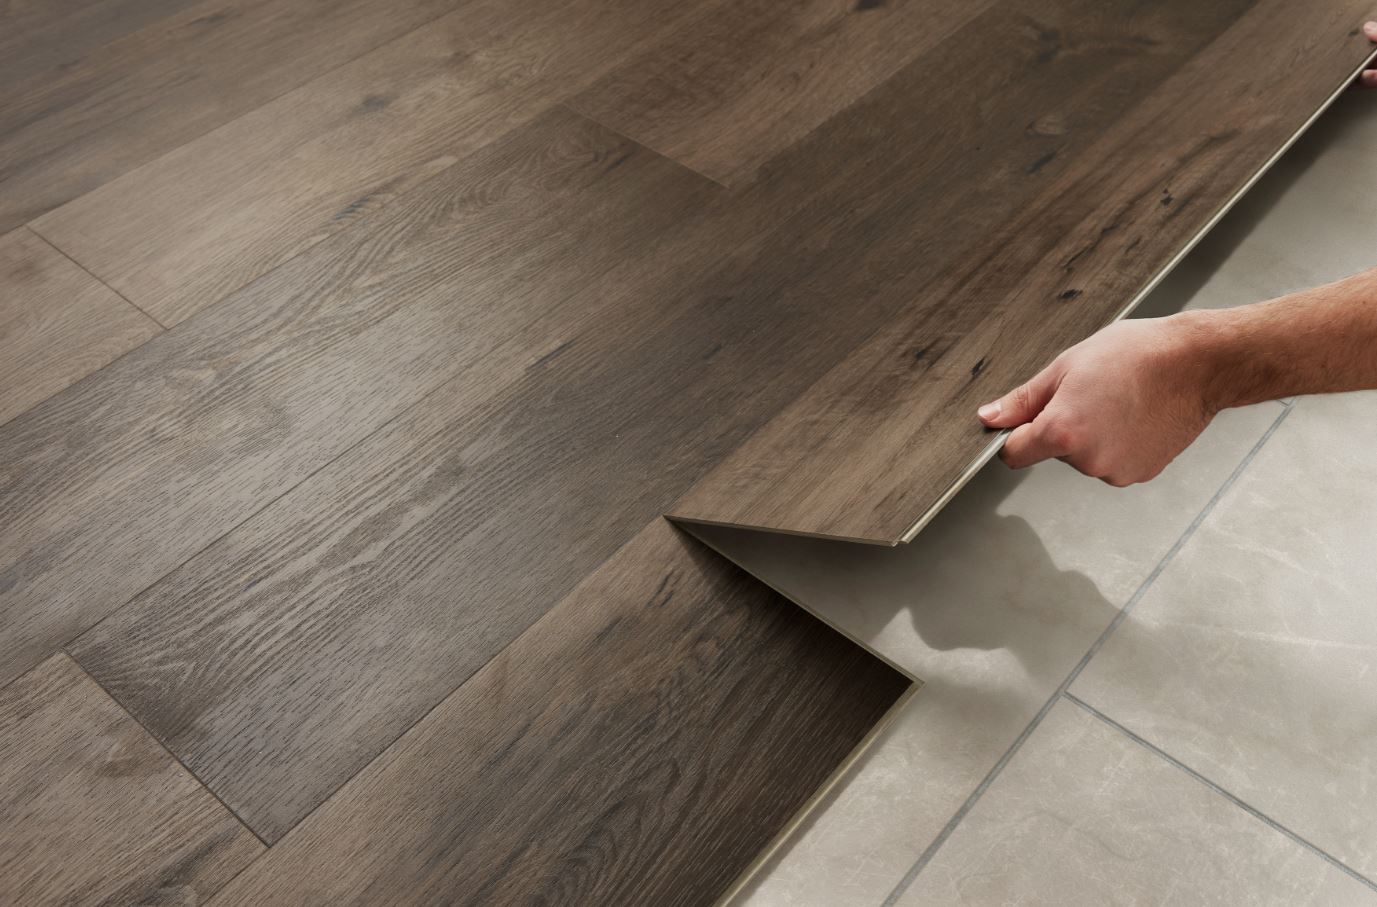
Floating LVT (luxury vinyl tile) is a type of flooring that is designed to be installed without using any adhesive or glue to fix it to the subfloor. Instead, the individual LVT planks or tiles are fitted together using a click-lock system that holds them securely in place. The result is a floor that “floats” on top of the subfloor, hence the name.
Floating LVT flooring can be installed over most types of subfloor, including concrete, wood, and even existing floors like tile or vinyl, as long as the subfloor is clean, level, and in good condition. This makes it a popular option for DIY installations, as it can be relatively easy to install without the need for specialized tools or adhesives.
One of the benefits of floating LVT is that it can be removed and reinstalled elsewhere if necessary, without causing damage to the subfloor or the tiles themselves. This also means that it can be a more cost-effective solution in the long run, as it can be reused instead of being replaced entirely.
Floating LVT is a versatile and durable flooring option that can provide a high-end look and feel to any space.
Installation process:
The installation process for floating LVT flooring typically involves the following steps:
- Subfloor preparation: The subfloor needs to be clean, level, and free from any debris or moisture. Any cracks or imperfections in the subfloor should be filled and leveled.
- Underlayment installation: A thin foam underlayment is usually recommended to help absorb sound, reduce moisture, and provide a cushion for the flooring. The underlayment is rolled out and taped together.
- Layout: Before installing the tiles, plan the layout by marking the center of the room and dry-fitting the tiles to determine the best starting point.
- Click-lock installation: Install the first row of tiles or planks along the longest wall of the room, locking each tile or plank together using the click-lock system. Continue installing subsequent rows, ensuring that the tiles or planks are staggered to create a natural-looking pattern.
- Cutting tiles: Measure and cut tiles to fit around the edges of the room or obstacles using a utility knife or a saw.
- Finishing touches: Once all the tiles have been installed, install baseboards or trim to cover the expansion gap around the perimeter of the room.
Floating LVT installation can be relatively straightforward, even for DIYers with some experience. However, it is important to follow the manufacturer’s instructions and consult with a professional installer if you are unsure about any steps in the process.
Comparison of two types of LVT floor
Available types
There are several types of glue-down LVT available on the market, each with its unique features and benefits. Some common types of glue-down LVT include:
- Traditional glue-down LVT: This is the most common type of glue-down LVT and is designed to be adhered directly to the subfloor using an adhesive. Traditional glue-down LVT typically offers superior stability and durability compared to other types of LVT.
- Peel-and-stick LVT: This type of LVT has an adhesive backing that allows it to be easily installed without the need for additional glue. Peel-and-stick LVT is a popular option for DIY installations or for areas where a fast and easy installation is desired.
- Pre-attached pad LVT: Some glue-down LVT products come with a pre-attached foam or cork pad that helps to reduce noise and absorb impact. This can be a good option for areas where sound control is important, such as multi-level buildings or apartments.
- Moisture-resistant LVT: Moisture-resistant LVT is designed to resist moisture and water damage, making it an ideal option for bathrooms, laundry rooms, or other areas that are prone to moisture. These products often have a waterproof core or backing to prevent water from seeping into the subfloor.
- Eco-friendly LVT: Some glue-down LVT products are made from recycled materials or are designed to be more environmentally friendly. These products can be a good option for homeowners or businesses looking to reduce their environmental impact.
Types of floating LVT:
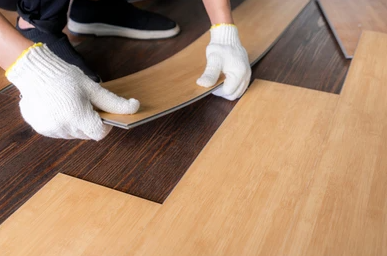
- Click-lock LVT: This is the most common type of floating LVT and is designed to be installed using a click-lock system that locks the planks or tiles together. Click-lock LVT is easy to install and can be removed and reinstalled if necessary.
- Loose lay LVT: Loose lay LVT is designed to be installed without any adhesive or click-lock system. The tiles or planks are simply laid in place and held down by their weight and friction. Loose-lay LVT can be a good option for DIY installations or for areas where easy removal is desired.
- Hybrid LVT: Hybrid LVT combines the benefits of traditional LVT with the ease of installation of click-lock LVT. These products typically feature a rigid core that provides stability and durability, while still allowing for easy installation and removal.
- WPC (Wood-Plastic Composite) LVT: WPC LVT is a type of hybrid LVT that features a wood-plastic composite core. This gives it the look and feel of hardwood flooring while still offering the durability and ease of maintenance of vinyl.
- SPC (Stone-Plastic Composite) LVT: SPC LVT is another type of hybrid LVT that features a stone-plastic composite core. This gives it added durability and resistance to scratches, dents, and moisture, making it an ideal option for high-traffic areas or areas prone to spills and moisture.
Maintenance and replacement
When it comes to maintenance and replacement, there are some key differences between glue-down LVT and floating LVT.
Maintenance:
- Glue-down LVT typically requires less maintenance than floating LVT, as it is firmly adhered to the subfloor and is less likely to shift or move over time. However, it may be more difficult to replace individual tiles or planks if they become damaged or worn.
- Floating LVT requires more maintenance than glue-down LVT, as it may shift or move over time and may need to be readjusted or reinstalled. However, individual tiles or planks can be easily replaced if they become damaged or worn.
Replacement:
- Glue-down LVT can be more difficult to replace than floating LVT, as it requires the old tiles or planks to be carefully removed and new ones to be glued down in their place. This can be time-consuming and may require professional help.
- Floating LVT is typically easier to replace than glue-down LVT, as individual tiles or planks can be easily removed and replaced as needed. This can be a cost-effective solution for areas that experience a lot of wear and tear.
The maintenance and replacement requirements of glue-down LVT and floating LVT will depend on a variety of factors, including the type of LVT, the quality of the installation, and the level of foot traffic in the space. It is important to carefully consider these factors when choosing between the two types of LVT to ensure that you select the option that best meets your needs.
Durability and noise
When it comes to durability and noise, there are some differences between glue-down LVT and floating LVT.
Durability:
- Glue-down LVT is generally considered to be more durable than floating LVT, as it is directly adhered to the subfloor and is less prone to shifting or movement over time. This can help to prevent wear and tear and extend the lifespan of the flooring.
- Floating LVT is still a durable option, but it may be more prone to movement or shifting over time, which can cause it to wear out more quickly.
Noise:
- Glue-down LVT is typically quieter than floating LVT, as it is firmly attached to the subfloor and can help to absorb sound and vibrations.
- Floating LVT may be more prone to producing noise or creaking, especially if it is not installed properly or if there are gaps between the tiles or planks.
Both glue-down LVT and floating LVT can be durable and quiet options for flooring, but glue-down LVT is generally considered to be the more durable and quieter of the two. However, the actual durability and noise level will depend on the specific product and installation method used. It is important to research and compares different products before deciding to ensure that you choose the option that best meets your needs.
Cost
Glue-down LVT:
- The cost of glue-down LVT typically includes the cost of the LVT itself, as well as the cost of adhesive and installation.
- The cost of glue-down LVT can vary widely depending on factors such as the quality of the LVT, the size of the installation area, and the complexity of the installation.
- In general, glue-down LVT tends to be more expensive than floating LVT, as it requires additional materials and labor for installation.
Floating LVT:
- The cost of floating LVT typically includes the cost of the LVT itself, as well as the cost of underlayment and installation.
- The cost of floating LVT can vary widely depending on factors such as the quality of the LVT, the size of the installation area, and the complexity of the installation.
- In general, floating LVT tends to be less expensive than glue-down LVT, as it requires fewer materials and less labor for installation.
Overall, the cost of glue-down LVT and floating LVT will depend on a variety of factors, including the quality of the product, the size of the installation area, and the complexity of the installation. While glue-down LVT tends to be more expensive than floating LVT, it may offer better durability and stability over time. It is important to compare the costs and benefits of each type of LVT before deciding to ensure that you choose the option that best meets your needs and budget.
In conclusion, both glue-down LVT flooring and floating LVT flooring are popular options for homeowners and businesses alike.
Ultimately, the choice between glue-down LVT flooring and floating LVT flooring will depend on your specific needs and preferences. Consider factors such as the size and location of the installation area, the level of foot traffic, and your budget when making a decision. With proper care and maintenance, both types of LVT can provide a durable and attractive flooring option for any space.
