Are you considering installing luxury vinyl tile (LVT) flooring in your home or business? LVT is a durable, low-maintenance flooring option that offers the look and feel of natural materials like hardwood and stone, but at a more affordable price point. However, proper installation is crucial for achieving the best possible results and ensuring the longevity of your flooring investment. In this article, we’ll provide you with a comprehensive set of guidelines for a successful LVT flooring installation, covering everything from preparation and tools to installation techniques and finishing touches. Whether you’re a seasoned DIYer or a first-time installer, our expert advice will help you achieve a beautiful, functional, and long-lasting LVT flooring installation.

Here are some general guidelines to follow for a successful LVT flooring installation:
- Prepare the Subfloor: The subfloor should be clean, dry, and level. If necessary, use a self-leveling compound to level any low spots or dips.
- Acclimate the Flooring: Allow the LVT flooring to acclimate in the installation space for at least 48 hours before installation. This will help to prevent any warping or buckling due to changes in temperature and humidity.
- Measure and Plan: Measure the installation space carefully and plan the layout of the flooring to minimize waste and ensure a balanced appearance.
- Gather Tools and Materials: Make sure you have all the necessary tools and materials on hand, including adhesive, spacers, a notched trowel, a utility knife, a straightedge, and a tapping block.
- Install Underlayment: If needed, install an underlayment to provide additional cushioning and sound insulation.
- Install Flooring: Apply adhesive to the subfloor and lay the LVT flooring in place, starting in the center of the room and working outward. Use spacers to maintain a consistent gap between planks, and use a tapping block and mallet to ensure a tight fit.
- Finish Edges and Transitions: Install transition strips and trim pieces to finish the edges and transitions between different flooring materials or rooms.
- Clean Up: Once the installation is complete, clean up any excess adhesive and allow the flooring to dry completely before walking on it.
It’s important to understand how to maintain and care for your new LVT flooring to keep it looking its best. In the following sections, we’ll dive deeper into these topics and provide you with expert advice and tips to help you achieve a flawless and long-lasting LVT flooring installation.
Introduction
LVT flooring, or luxury vinyl tile flooring, is a type of resilient flooring that is designed to mimic the look and feel of natural materials like hardwood, stone, and ceramic tile. It is made up of several layers, including a wear layer, a printed design layer, a core layer, and a backing layer, which work together to provide durability, stability, and moisture resistance.
Proper installation precautions are crucial for several reasons. First, LVT flooring can be expensive, and improper installation can result in wasted materials and additional costs. Second, LVT flooring is designed to last for many years, so a poor installation job can lead to early wear and tear, damage, or even failure. Finally, improperly installed LVT flooring can present safety hazards, such as tripping or slipping, which can be especially dangerous in commercial or high-traffic areas.
Some important installation precautions to consider when installing LVT flooring include proper subfloor preparation, acclimation of the flooring materials, careful measurement and layout, use of appropriate tools and adhesives, and adherence to industry standards and building codes. By taking these precautions, you can ensure that your LVT flooring installation is done correctly and that it will provide long-lasting beauty, function, and safety for your home or business.
Pre-installation Considerations
Pre-installation considerations are essential to ensure a successful LVT flooring installation. Three critical pre-installation considerations for LVT flooring are acclimation of the flooring to the environment, an inspection of the subfloor, and preparation of the subfloor.
- Acclimation of LVT flooring to the environment: It is essential to allow the LVT flooring to acclimate to the environment in which it will be installed. Acclimation means that the flooring material is allowed to sit in the installation area for at least 48 hours before installation to adjust to the temperature and humidity conditions of the space. This step is crucial to prevent the flooring from expanding or contracting after installation, which can cause gaps or buckling.
- Inspection of a subfloor for flatness, cracks, and moisture issues: It is important to inspect the subfloor before installation to ensure that it is flat, smooth, and free from any cracks, debris, or moisture. Uneven subfloors can cause the flooring to settle unevenly, leading to gaps or buckling. Moisture issues can cause the flooring to warp, buckle, or deteriorate over time. Addressing any subfloor issues before installation can prevent these problems and ensure a smooth and level surface for installation.
- Preparation of subfloor, including cleaning and leveling: After inspecting the subfloor, it is essential to prepare it for installation. This includes cleaning the surface of any debris, dust, or other materials that could interfere with the adhesion of the LVT flooring. It may also involve leveling the subfloor using a self-leveling compound to fill any low spots or dips, creating a smooth and level surface for installation.
In summary, pre-installation considerations for LVT flooring include acclimation of the flooring to the environment, an inspection of the subfloor for flatness, cracks, and moisture issues, and preparation of the subfloor, including cleaning and leveling. Taking the time to address these factors before installation can ensure a smooth and long-lasting LVT flooring installation.

Installation Precautions
| Precaution | Advice |
|---|---|
| 1. Acclimate the LVT | Allow the LVT flooring to acclimate to the room’s temperature and humidity for at least 48 hours before installation. This will prevent expansion or contraction of the planks after installation. |
| 2. Check the Subfloor | Ensure that the subfloor is clean, level, and free of debris. If there are any dips or bumps, level the subfloor with a self-leveling compound or patching compound. |
| 3. Use Proper Tools | Use the correct tools and equipment for the installation, including a level, measuring tape, saw, and spacers. This will ensure a precise and professional installation. |
| 4. Follow Manufacturer’s Guidelines | Follow the manufacturer’s guidelines for installation, including the recommended adhesive, underlayment, and installation method. This will ensure the warranty is not voided and the LVT is installed properly. |
| 5. Plan Ahead | Plan the installation carefully, including layout, trimming, and transitions. This will prevent mistakes and ensure a smooth installation. |
| 6. Test the Adhesive | Test the adhesive on a small section of the floor before installation to ensure it is compatible with the LVT and subfloor. |
| 7. Leave Expansion Gaps | Leave expansion gaps around the perimeter of the room and at doorways to allow for expansion and contraction of the LVT. |
| 8. Protect the LVT | Protect the LVT during installation by using a soft cloth or padding to prevent scratches or damage. |
| 9. Allow for Ventilation | Allow for proper ventilation during installation by opening windows and using fans to prevent fumes from adhesives and other installation materials from accumulating in the room. |
| 10. Follow Safety Precautions | Follow safety precautions, such as wearing gloves and protective eyewear, to prevent injury during installation. |
When installing LVT flooring, it is essential to take certain precautions to ensure that the installation is done correctly and that the flooring will last for years to come. Some critical installation precautions include:
- Use of manufacturer-recommended adhesive and installation methods: It is important to use the adhesive and installation methods recommended by the manufacturer of the LVT flooring. Using the wrong adhesive or installation method can lead to poor adhesion, premature wear, and tear, or even failure of the flooring.
- Proper spacing around the room perimeter and between tiles: It is important to leave an adequate gap around the perimeter of the room and between tiles to allow for expansion and contraction of the flooring. This gap should be consistent throughout the installation and can be achieved using spacers.
- Ensuring correct placement and alignment of tiles: Proper placement and alignment of the LVT tiles are critical to ensure a smooth and uniform appearance. Taking the time to measure and plan the layout of the tiles can help to ensure correct placement and alignment.
- Avoiding over-application of adhesive and excessive trowel marks: Over-application of adhesive or excessive trowel marks can cause unevenness and other issues with the installation. Using the right amount of adhesive and troweling it evenly can help to prevent these issues.
- Taking care to prevent damage to tiles during the installation process: It is important to handle the LVT tiles carefully during the installation process to prevent damage, such as cracking or chipping. Using appropriate tools and techniques, such as a tapping block and mallet, can help to ensure that the tiles are installed without damage.
By taking these precautions, you can help to ensure a successful LVT flooring installation that is durable, functional, and aesthetically pleasing. Remember to always follow the manufacturer’s specific instructions for installation, as they may vary depending on the type and brand of LVT flooring you’re installing.
Post-Installation Precautions
| Precaution | Advice |
|---|---|
| 1. Wait Before Use | Wait at least 24 hours before walking on or placing heavy furniture on the LVT flooring to allow the adhesive to fully cure. |
| 2. Use Felt Pads | Use felt pads under furniture legs to prevent scratches or damage to the LVT flooring. |
| 3. Sweep Regularly | Sweep the LVT flooring regularly to remove dust and debris. Avoid using a vacuum with a beater bar as it can scratch the surface of the flooring. |
| 4. Clean with Proper Solutions | Clean the LVT flooring with a mild cleaner specifically designed for LVT flooring. Avoid using harsh chemicals or abrasive cleaners that can damage the surface. |
| 5. Use Mats and Rugs | Use mats or rugs in high-traffic areas or at entryways to prevent dirt and debris from being tracked onto the LVT flooring. |
| 6. Handle Spills Promptly | Clean up spills promptly to prevent staining or damage to the LVT flooring. |
| 7. Avoid Direct Sunlight | Avoid exposing the LVT flooring to direct sunlight for extended periods of time, as this can cause fading or discoloration. |
| 8. Trim Pet Nails | Trim pet nails regularly to prevent scratches or damage to the LVT flooring. |
| 9. Follow Manufacturer’s Recommendations | Follow the manufacturer’s recommendations for maintenance and cleaning to ensure the warranty is not voided and the LVT is properly maintained. |
| 10. Repair Damage Quickly | Address any damage or issues with the LVT flooring quickly to prevent further damage or problems. |
After the installation of LVT flooring, it is important to take certain precautions to ensure that the flooring remains in good condition and lasts for many years. Some post-installation precautions to consider include:
- Allowing sufficient time for the adhesive to cure before heavy foot traffic or furniture placement: It is essential to allow the adhesive to cure fully before subjecting the flooring to heavy foot traffic or placing furniture on it. This typically takes 24-48 hours, but it’s essential to follow the manufacturer’s recommendations for the specific adhesive used.
- Proper cleaning and maintenance of LVT flooring: Proper cleaning and maintenance are essential to keeping the LVT flooring in good condition. This includes regular sweeping, vacuuming, and damp mopping with a pH-neutral cleaner. Avoid using abrasive or harsh cleaning products that can damage the flooring. Additionally, avoid exposing the flooring to excessive moisture, which can cause warping or other damage.
- Addressing any issues promptly to avoid further damage or wear: It’s important to address any issues with the LVT flooring promptly to avoid further damage or wear. For example, if a tile becomes damaged or comes loose, it should be replaced as soon as possible to prevent further damage to surrounding tiles. Regular inspections of the flooring can help to identify any issues before they become more significant problems.
By taking these post-installation precautions, you can help to ensure that your LVT flooring remains in good condition and provides many years of use and enjoyment. Remember to always follow the manufacturer’s recommendations for cleaning and maintenance, and address any issues promptly to avoid further damage or wear.
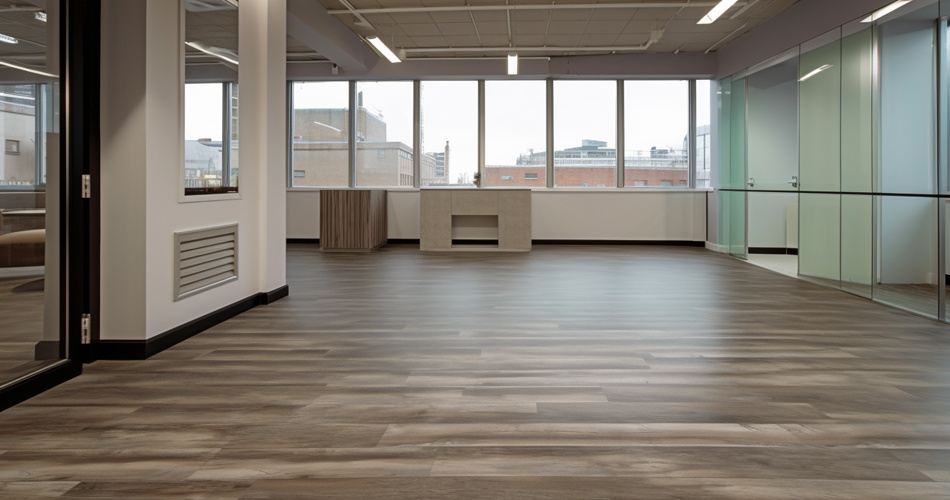
In conclusion, a successful LVT flooring installation requires careful planning, attention to detail, and adherence to industry standards and manufacturer recommendations. Proper pre-installation considerations, such as acclimation of the flooring, inspection of the subfloor, and preparation of the subfloor, are essential to ensuring a smooth and level surface for installation.By following these guidelines, you can achieve a beautiful, functional, and long-lasting LVT flooring installation that will provide years of use and enjoyment.


